
Hey plant lovers! Have you ever wanted to grow beautiful houseplants—without the mess of soil? Well, you’re in luck! Today, I’m going to show you how to grow plants in water—yes, just water! It’s easy, low-maintenance, and perfect for any space, whether it’s your kitchen, bathroom, or even your desk!
Many houseplants have a built-in survival trick—they can grow roots just from a simple cutting when placed in water. And the best part? Some plants can live like this for their entire life!
Not only does this method look sleek and modern, but it also works with a variety of plants, including flowering ones like orchids and paperwhites!
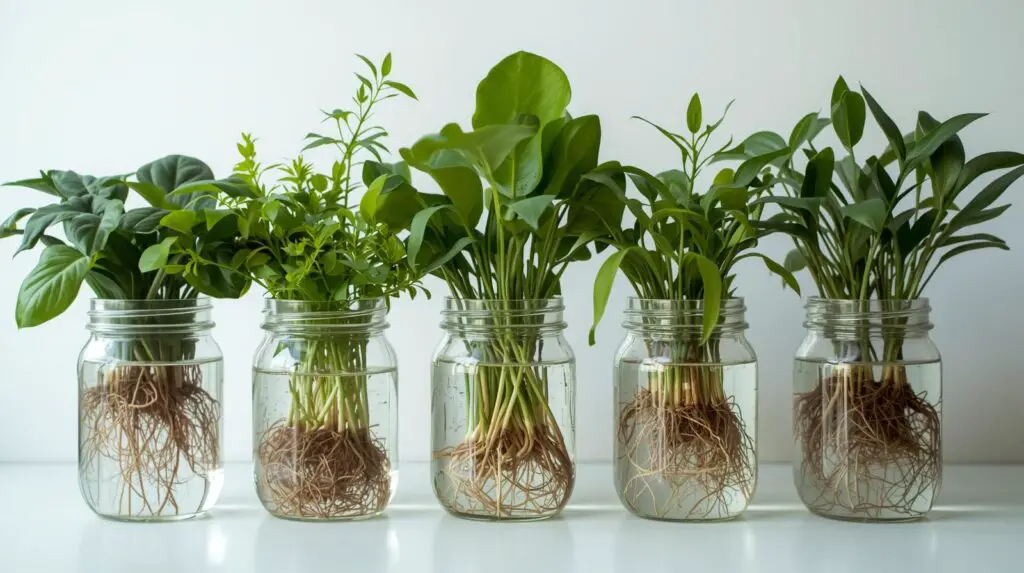
First up, you’ll need a container! You can use any vessel that holds water, but glass jars and vases are a favorite because you can actually see the roots grow—it’s like nature’s own artwork!
However, glass can get algae buildup over time, so if you want something low-maintenance, go for an opaque vase to reduce light exposure.
Next, think about light! Different plants have different needs—some love the sun, while others prefer shade. Before you place your plant, check how much light it actually needs.
Now for the most important part—water! To keep your plants happy, change the water regularly, especially if it starts looking cloudy. And if possible, use chlorine-free water for the best results.
Since there’s no soil to provide nutrients, add a water-soluble fertilizer at 1/4 strength every few weeks to keep your plant thriving!
Now, let’s talk about the BEST plants to grow in water!
Let start with Foliage type plants.
- Pothos.
Pothos is one of the easiest plants to grow in water. It’s low-maintenance, beautiful, and can thrive without soil indefinitely! Here’s how to do it:
To grow Pothos in water only, start by taking a healthy cutting from a mature plant. Choose a 4-6 inch stem with at least 2-3 nodes and remove any leaves that would be submerged in water.
Place the cutting in a glass jar, vase, or opaque container filled with filtered, dechlorinated, or distilled water. Ensure the nodes are submerged while keeping the leaves above water.
Position the container in bright, indirect light, avoiding harsh sunlight or deep shade. Change the water every 7-10 days to prevent stagnation and bacteria buildup.
If the water becomes cloudy, replace it immediately. To provide nutrients, add a few drops of liquid houseplant fertilizer at ¼ strength every 4-6 weeks. Roots will begin to develop in about 2-4 weeks, and the plant can continue growing in water indefinitely.
If desired, multiple cuttings can be placed in the same container for a fuller look.
2. Philodendron.
You can grow a Philodendron in water because they are easily propagated through water cuttings, making it a simple and visually appealing way to multiply your plant, while also giving you a unique display option where the roots are visible.
To grow a Philodendron in water, simply take a healthy stem cutting with at least one node, place it in a glass of fresh water with bright, indirect light, and change the water regularly until roots develop, then you can choose to pot it in soil if desired.
3. Monstera.
You can grow a Monstera plant in water by placing a Monstera stem with an aerial root node in a container of fresh water, you can encourage new root growth, allowing you to later transplant the rooted cutting into soil to grow a new Monstera plant; this method is popular because it allows you to easily monitor root development and is considered a beginner-friendly way to propagate the plant.
Choose a healthy Monstera stem with at least one aerial root node.
Cut the stem just below the aerial root node, removing most lower leaves.
Put the cutting in a clean container with fresh, filtered water, ensuring the aerial root node is submerged.
Place the container in bright, indirect light.
Replace the water every few days to prevent bacteria growth.
Clean the roots once a month and clip away any brown or rotting roots. Use hydroponic fertilizer to feed your monstera once or twice a month.
4. Spider plant.
Spider plant has long, spindly leaf blades, giving it its spidery name. Take cuttings or the plantlets from the plant. Spider plants make little tufted growths at the end of their stems. You can cut the plantlet from the stolon with clean, sharp scissors.
Cuttings root quickly. Change the water every three to five days. Add fertilizer to the water once a month. Keep the plant in bright, indirect light. Never let the leaves fall into the water. Roots should be the only submerged part of the plant. Add rocks to the bottom of the glass for roots to grab onto.
5. lucky bamboo.
The hardy stalks of lucky bamboo can become a living centerpiece with no soil required.
Growers often train the stalks of lucky bamboo into spirals or woven shapes, and while these extensions don’t affect the plant’s ability to grow in water, plants can become very top-heavy and require more than just water to stay in place.
Surround your lucky bamboo with colorful gravel or rocks, adding to the ornamental value and providing some support.
6. Chinese Evergreen.
Despite evergreen in its common name, it’s not an evergreen tree; it’s a tropical plant with floppy green leaves native to Asia and only grows in warmer climates.
To grow it in water, use a sterilized pruner or snips to cut a healthy six-inch stem from a healthy Chinese evergreen plant. Place the cut end of the stem into water, and remove the bottom leaves that are underwater. Roots should appear in three to four weeks.
Put the plant in indirect sunlight and change the water every three days or so when the water becomes dirty or cloudy.
Give the plant a few drops of water-soluble, liquid fertilizer monthly to encourage growth.
7. Snake Plant.
You can grow a snake plant in water because it is a resilient plant that can easily root in water, making it a simple way to propagate new snake plants, and it also allows you to visually monitor root development while enjoying the decorative qualities of the plant in a vase or container without soil; however, be aware that rooting in water can be a slower process compared to soil propagation, and you will need to regularly change the water to prevent bacterial growth.
To do this, Cut a healthy leaf from the base of a mature snake plant, ensuring the cut is clean and straight.
Remove the lower 2 inches of leaves from the cut end to allow for root development.
Put the cut end of the snake plant leaf into a clean glass or vase filled with fresh water.
Position the container in bright, indirect light.
Change the water every week to prevent bacteria buildup and add a small amount of diluted liquid houseplant fertilizer every few weeks.
8. ZZ plant.
A ZZ plant can be grown in water with fertilizer because it’s a relatively easy-to-propagate plant that can tolerate root development in water, although it generally thrives better in soil; you can grow a ZZ plant in water with fertilizer by taking a stem cutting, placing it in a container with fresh water, and adding a diluted liquid houseplant fertilizer sparingly during the growing season, ensuring the water is changed regularly to prevent bacteria growth.
9. Wandering Jew.
Wandering Jew makes for some beautiful houseplants that are sure to brighten up any room in your home. Contrary to popular belief, Wandering Jew is not a single plant, but rather the common name for a variety of Tradescantia species
A Wandering Jew plant can be grown in water because it is incredibly easy to propagate this way, making it a great choice for beginners; simply take a healthy stem cutting, place the cut end in a glass of water, and watch as roots develop within a few weeks.
it thrives in bright, indirect sunlight.
10. Peace Lilly.
Peace lilies have large, glossy green leaves that bloom with a white spathe or “flag of surrender” sheath, hence its name.
You can use narrow vases to grow peace lilies in water, but you can also use a simple tall glass to suspend the base of the plant above the water but hold the stems in place at the mouth of the container.
The base of the plant must be above the water, either by using a narrow-necked vase or a layer of small river rocks or pea gravel. The roots grow in the water, but the base of the plant and its leaves can’t be constantly wet, which can cause rot.
Unroot the plant from its pot, and clean off the roots with running water. Submerge the plant in water up to the roots only. Replace the water as the water line goes down. Completely change the water once every two weeks.
Place the plant in a spot that gets bright, indirect light. Fertilize the plant with hydroponic fertilizer, a few drops during water changes. Ideal temperatures for the plant are 65 to 85 degrees Fahrenheit.
11. coleus.
With many new coleus varieties hitting the market each spring, it’s easy to design an entire garden around this tropical plant’s colorful leaves.
As coleus plants have grown in popularity, their prices have increased accordingly. Still, coleus plants are easy to propagate and grow in water, allowing you to create a colony of handsome plants.
Take a six-inch cutting and remove the leaves from the bottom four inches. Place the cutting in a glass or vase of water, and you will see roots begin to form in several weeks.
Adding a bit of compost tea to the water during monthly changes will help your coleus plants thrive.
12. Aluminun plant.
Aluminum plant also called watermelon pilea, is an Asian native species of flowering plant in the nettle family.
You can transfer an established plant with roots into a container with water or take a stem cutting and submerge the newly cut stem into the water. The stem will form roots after several weeks.
To replace the nutrients the plant is missing from soil or rainwater, feed the plant with hydroponic fertilizer once a month. Change the water every two weeks or sooner if the water appears murky.
13. begonias.
The thick, succulent stems of begonias are very forgiving when harvesting the stems to grow in water.
Practice with hardy wax begonias, which have very knobby leaf nodes that form roots easily. Even the fancy rex begonias and tuberous begonias will grow in water, and only a single leaf is necessary to start a whole new plant.
Roots can take a couple of months to form, and it’s wise to perform weekly water changes to prevent bacteria that can lead to rot.
14. Mint.
Mint is such a vigorous grower; it will root within ten days. Take stem cuttings, remove all the lower leaves, and place the bottom half of the stems in water. Change the water and wash the glass once a week.
Place the plant in a bright window. You can maintain mint this way for some time with occasional drops of hydroponic fertilizer.
15. Basil.
You can grow basil in water because it readily roots from stem cuttings when placed in a glass of water, making it a simple way to propagate new basil plants and have a continuous supply of fresh herbs right on your kitchen counter; simply take a healthy stem with a few leaves, remove the lower leaves, and place it in fresh water, changing the water regularly until roots develop.
Place the glass in a warm, bright location with indirect light.
Next, let’s move onto Flowering Plants that you can grow in water.
16. Orchids (Various species)
Growing orchids in water, also called “water culture,” is possible because some orchid species, like moth orchids, have robust roots that can absorb moisture and nutrients directly from water, mimicking their natural epiphytic growth where they cling to trees and absorb moisture from the air.
However, it’s not the most common method as it requires careful management to prevent root rot, and it’s considered an advanced technique, where you need to ensure the roots have periods of air exposure to avoid oversaturation.
The key to growing orchids in water is that only part of the root system is in water. Orchids need their roots to dry out somewhat.
Remove the plant from its container and remove all growing medium from its roots. If the roots are tangled, gently tease them apart and remove any diseased or damaged roots.
In a clean vessel, add enough non-chlorinated water to cover a half to two thirds of the orchid’s roots. The leaves must be kept dry.
17. Paperwhites
Paperwhites are popular indoor plants for winter with their clusters of very fragrant, white blooms.
Forcing them to bloom indoors is as easy as putting the bulbs in a water dish with some stones or marbles to anchor them. Position the paperwhite bulbs with the pointed end up on top of the stone layer. Add another layer of stones to fill in any gaps and nearly cover the bulbs.
The pointed tip of the bulbs should still be showing. Tight spacing is fine. Paperwhites not only look better in a group, but the tight fit will provide support and help keep them from toppling over.
Paperwhites will bloom for a week or two before fading. The flowers will last longer in a cooler spot with dappled light.
18. Lotus.
Lotus flowers are a marvel to behold, round and centered around a radial notch, appearing to float above the water’s surface.
The plant’s root structure grows below the muddy surface, sending a stem above the water’s surface. You can replicate this growing method using a dwarf lotus plant in a shallow, six-inch bowl with pea gravel as the substrate to hold down the rhizome (root).
Provide hydroponic nutrients during the regular growing season; stop fertilizer during the dormant months (winter). Change the water every few weeks when it looks like it’s about to get murky.
The plant can survive in bright, full sun, with temperatures above 32 degrees Fahrenheit. Temperatures below freezing can kill the plant.
19. African Voilet.
Growing African violet leaves in water is usually a good way to create a clone of the parent plant. However, some multicolor violets will yield plants with solid color flowers.
Choose young, healthy African violet leaves to start new plants. Cut the leaf with about two inches of stem, and place the leaf in a narrow-necked bottle that keeps the leaf suspended and dry.
Roots take about a month to form. Over time a tiny plantlet will form, complete with its own crown.
20. Impatiens
Impatiens are a standby for shady gardens, but sometimes it can be challenging to keep them moist enough. Impatiens can grow as marginal pond plants—that’s how much they adore the water.
Snip off a few stems at the end of the growing season, and overwinter them in a vase where they will root and grow as clones of the parent plant.
You’ll have a free supply of impatiens in the spring to plant in your shady garden.
21. Anthurium
Also known as flamingo flowers or laceleaf plants, anthuriums originate from warmer areas of the Caribbean and South America. There heart-shaped leaves help her steal the show in any room.
Anthuriums can be grown in water because they are well-suited to hydroponics, meaning they can thrive with their roots submerged in water, allowing you to easily observe root growth while also providing a visually appealing display in a vase or container.
To grow an Anthurium in water, simply remove all soil from the roots, place the plant in a vessel with room temperature water ensuring only the roots are submerged, and change the water regularly while providing necessary nutrients with a diluted liquid fertilizer.
22. Geraniums.
Geraniums are a type of perennial plant that can be grown indoors as houseplants. They are popular for their colorful flowers and ease of care.
While you can technically grow geraniums in water by rooting cuttings in a glass of water, it’s not the most ideal method as it can lead to root rot due to the constant moisture and has a lower success rate compared to rooting them directly in soil.
However, if you want to quickly propagate a geranium, you can try taking a healthy stem cutting and placing it in a jar with fresh water, changing the water frequently
23. Hyacinths.
Hyacinths can be grown in water because their bulbs are able to develop roots directly in water, allowing for a beautiful indoor display of fragrant flowers without needing soil; to grow them, simply place a hyacinth bulb in a glass vase with a small amount of water, ensuring the bulb sits just above the water level, and keep it in a cool, dark place until roots develop, then move it to a brighter location to encourage flowering.
24. Chrysanthemum.
You can grow Chrysanthemums in water by taking stem cuttings from a healthy plant, removing the lower leaves, and placing the cut end in a container of fresh water, allowing the roots to develop in the water before eventually transferring them to soil; this is a simple method for propagating new Chrysanthemum plants and is a great way to enjoy fresh flowers indoors, especially if you want to monitor root development and easily change the water as needed.
Let’s move on to Herbs & Edibles that can be grown in water.
25. Rosemary.
Rosemary takes two to six weeks to root in water. Take six-inch cuttings from new growth, place the bottom of the stem in water, remove the leaves below the water line, and place the plant in a bright window. Refresh the water daily or every few days.
For long-term growth in water, rosemary will need hydroponic fertilizer.
26. Thyme.
You can grow thyme in water because it’s a relatively easy way to propagate new thyme plants from cuttings, allowing you to readily access fresh thyme from a small indoor plant by simply taking stem clippings and rooting them in a glass of water on a sunny windowsill; just be sure to remove lower leaves to prevent them from rotting in the water and change the water regularly to keep it clean.
The best time to root cuttings from this perennial herb is between mid-spring and early summer, when the plant is producing fresh, new growth. Make your cut just below a node, which is the part of a stem from which leaves sprout. Your thyme stems should start rooting about two weeks after being placed in water.
27. Oregano.
Growing oregano in water is a simple and convenient way to have a fresh supply of this aromatic herb without the need for soil. It’s an excellent option for small spaces, requires minimal maintenance, and keeps your kitchen clean from dirt.
Oregano is a hardy herb that can thrive in water indefinitely with proper care, making it a great choice for hydroponic gardening. Plus, it adds a touch of greenery to your home while being readily available for cooking.
To grow oregano in water, start by cutting a 4–6-inch stem from a healthy oregano plant, preferably a young, non-flowering shoot.
Remove the lower leaves to prevent rot and place the cutting in a glass jar or vase filled with filtered or dechlorinated water. Ensure at least one or two nodes are submerged while the leaves stay above the waterline.
Position the jar in bright, indirect sunlight, such as on a windowsill, and avoid direct sun to prevent excessive algae growth. Change the water every few days to keep it fresh and oxygenated, and once roots start forming (usually within two weeks), you can add a diluted liquid fertilizer every 4-6 weeks to provide essential nutrients.
With consistent care, oregano will continue to grow in water, providing a fresh, flavorful herb for your culinary needs.
28. Green Onion.
Growing green onions in water is an easy and sustainable way to have a continuous supply of fresh scallions without needing soil.
This method is perfect for small spaces, requires minimal effort, and allows you to regrow store-bought green onions multiple times, reducing food waste.
Green onions grow quickly in water, making them a great choice for beginner gardeners or anyone looking for a low-maintenance indoor plant.
To grow green onions in water, start by cutting the green tops for use, leaving about 1-2 inches of the white bulb and roots intact.
Place the bulbs root-side down in a glass or jar filled with just enough water to cover the roots but not submerge the entire bulb.
Position the jar in a bright spot with indirect sunlight, such as a kitchen windowsill. Change the water every 2-3 days to prevent bacterial growth and keep the roots healthy.
Within a few days, new green shoots will begin to sprout, and you can harvest them once they reach a few inches tall. Simply snip off what you need and let the plant continue growing for multiple harvests.
29. Lemongrass.
Lemongrass thrives in water, making it a perfect low-maintenance option for indoor gardeners. It regrows quickly, requires minimal care, and provides a continuous harvest for culinary use, teas, or natural insect repellents.
To grow lemongrass in water, start with fresh stalks from a grocery store or market.
Choose stalks with intact, firm bases and remove any dry or damaged leaves. Place the stalks in a glass or jar with about 2-3 inches of water, ensuring the bottom portion is submerged while keeping the leaves above water.
Set the container in a sunny location, such as a windowsill, where it will receive plenty of indirect sunlight. Change the water every few days to keep it fresh and prevent bacterial growth.
Within a week, new roots will begin to form, and soon after, fresh green shoots will emerge from the top.
Once the lemongrass has established strong roots, you can continue growing it in water indefinitely or transfer it to soil for faster growth. Regularly trim the leaves for use in cooking, and the plant will keep producing new growth.
30. Celery.
Growing celery in water is a simple and sustainable way to regrow scraps, reducing waste while providing a fresh supply of crisp, flavorful stalks. Celery has a natural ability to regenerate from its base, making it a great choice for water propagation.
This method is perfect for those who want to experiment with hydroponic gardening or don’t have outdoor space for a garden.
While celery won’t grow into full-sized stalks like those in grocery stores, it will produce tender leaves and smaller stalks that are great for soups, salads, and garnishes.
To grow celery in water, start with a store-bought bunch and cut off the stalks, leaving about 2 inches of the base intact. Place the base in a shallow bowl or jar with enough water to cover just the bottom.
Set it in a sunny location, such as a windowsill, and change the water every couple of days to prevent mold or rot. Within a few days, new green leaves will sprout from the center, and small roots will begin forming at the bottom.
As the plant continues to grow, you can harvest the new leaves for cooking. For longer-term growth, you can keep the celery in water or transfer it to soil for a more robust plant.
31. Lettuce.
Growing lettuce in water, also known as “regrowing lettuce,” is a simple way to extend the life of a lettuce head by placing the cut stem end in a shallow dish of water, allowing it to sprout new leaves from the base, essentially giving you a small second harvest from the same lettuce; this method is primarily done for its ease and as a sustainable practice, rather than for large-scale lettuce production, as it only produces a limited amount of new leaves.
32. Spinach.
Growing spinach in water is a simple and efficient way to have a fresh supply of nutritious greens without soil. Spinach is packed with vitamins and minerals, making it a great choice for hydroponic growing.
By cultivating it in water, you can reduce mess, minimize pests, and enjoy a steady harvest of tender leaves for salads, smoothies, and cooking. This method is also ideal for small spaces, as you only need a container and a light source to grow it successfully.
To grow spinach in water, start with cuttings or seeds. If using cuttings, take a healthy stem with a few leaves and place it in a jar or container with clean, non-chlorinated water.
If growing from seeds, germinate them in a damp paper towel before transferring the seedlings into a hydroponic setup or a water-filled container.
Ensure the roots are submerged while keeping the leaves above water. Place the container in a spot with bright, indirect light, or use a grow light for optimal growth.
Change the water every few days to prevent stagnation and algae buildup. Adding a diluted liquid fertilizer once a week will provide the necessary nutrients that spinach would normally absorb from soil.
Within a few weeks, new leaves will start to grow, and you can begin harvesting the outer leaves while allowing the inner ones to continue developing for a continuous supply.
33. Sweet Potato Vine.
Sweet potatoes in the U.S. are grown mostly in the South. They are planted in the spring by “slips.” These are the small rooted pieces of the vine that grow from the “eyes” or buds of the potato.
The sweet potato produces vine-like stems that resemble the philodendron plant. Place the sweet potato in a container of water. Keep the top 1/3 of the potato exposed by placing toothpicks into the sides.
The pointed end should be down in the water. In a few weeks a vine with several stems will begin to sprout. The stems are weak; tie the stems to a stake.
Sweet potatoes like a bright, sunny location and require care like house plants such as ivy.
Fertilize about once a month.
If the sweet potato vine gets too long, cut it back a few inches to force the vine to get bushier. The tip of the vine that was pinched off can be rooted in water or moist soil.
Your sweet potato vines can be planted outside in late May to produce sweet potatoes that can be dug and eaten in the fall.
And that’s it! Growing plants in water is easy, stylish, and a great way to add greenery to your home with minimal effort. Have you tried this before? Let me know in the comments which plants you’d love to grow hydroponically! Don’t forget to like and subscribe for more plant tips!
And I’m sure you’re going to enjoy this next video on Top 25 Companion Plants to Naturally Get Rid of Pests.